Kcptun是一个非常简单和快速的,基于KCP协议的UDP隧道,它可以将TCP流转换为KCP+UDP流。而KCP是一个快速可靠协议,能以比TCP浪费10%-20%的带宽的代价,换取平均延迟降低 30%-40%,且最大延迟降低三倍的传输效果。
Kcptun是KCP协议的一个简单应用,可以用于任意TCP网络程序的传输承载,以提高网络流畅度,降低掉线情况。
Kcptun服务端配置
GitHub上Kcptun的项目地址为https://github.com/xtaci/kcptun
我这里用的是Ubuntu 16.04 64位系统
首先为Kcptun创建文件夹
# mkdir /root/kcptun

# cd /root/kcptun
下载Linux 64版本,当前最新版本号为20181002
# wget https://github.com/xtaci/kcptun/releases/download/v20181022/kcptun-linux-amd64-20181002.tar.gz
解压下载的文件包
#tar -zxvf kcptun-linux-amd64-20181002.tar.gz
新建一个Kcptun配置文件
vi /root/kcptun/server-config.json
配置文件内容如下
“listen”: “:6666”,
“target”: “127.0.0.1:2233”,
“key”: “test”,
“crypt”: “aes”,
“mode”: “fast2”,
“mtu”: 1350,
“sndwnd”: 1024,
“rcvwnd”: 1024,
“datashard”: 70,
“parityshard”: 30,
“dscp”: 46,
“nocomp”: false,
“acknodelay”: false,
“nodelay”: 0,
“interval”: 40,
“resend”: 0,
“nc”: 0,
“sockbuf”: 4194304,
“keepalive”: 10
“log”: “/root/kcptun/kcptun.log”
}
解释一下这个配置文件中各项的意思:
1、listen是Kcptun监听的端口,也就是Kcptun的服务端口,这里可以自行修改。
2、target是你准备加速的IP和端口,IP可以是127.0.0.1,如果不行,替换为你ss的IP;端口号要填写你的ss端口号,这里以2233为例。
3、key是通讯密钥,这里设置为test,你可以修改为你自己的。
4、crypt是加密方式,默认是aes,同时还支持aes-128, aes-192, salsa20, blowfish, twofish, cast5, 3des, tea, xtea, xor, none。可以自行修改。
5、mode是传输模式,这里建议默认使用fast2。
6、sndwnd以及rcvwnd是你的本地带宽速度,比如本地100M,这里就填写1024即可。
7、log是服务端日志存放地址
8、其他的一些参数一般无需更改,具体请参考GitHub项目网页。
新建一个启动的脚本
vi /root/kcptun/start.sh
运行脚本
sh /root/kcptun/start.sh
添加如下内容
cd /root/kcptun/
./server_linux_amd64 -c /root/kcptun/server-config.json 2>&1 &
echo “KcpTun Started”
新建一个关闭的脚本
vi /root/kcptun/stop.sh
添加如下内容
PID=`ps -ef | grep server_linux_amd64 | grep -v grep | awk ‘{print $2}’`
kill -9 $PID
在 Kcptun运行过程中,可以查看当前状态
ps -ef | grep server_linux_amd64
看到类似入下的内容表示kcptun正在运行
Kcptun客户端配置
这里使用Windows系统,首先在https://github.com/xtaci/kcptun/releases页面上下载Windows版本文件包,并解压到一个文件夹内。
由于没有图形界面,我们创建一个启动文件start.vbs,内容如下:
Set fso = CreateObject(“Scripting.FileSystemObject”)
Set WshShell = WScript.CreateObject(“WScript.Shell”)
‘get file path
currentPath = fso.GetFile(Wscript.ScriptFullName).ParentFolder.Path & “\”
‘kcptun config
kcptunConfig = “client_windows_amd64.exe -l :12300 -r 127.0.0.1:2233 -key test -crypt aes -mtu 1400 -sndwnd 256 -rcvwnd 2048 -mode fast2 -conn 4”
‘log file path
logFile = “kcptun.log”
‘get commond line
cmdLine = “cmd /c ” & currentPath & kcptunConfig & ” > ” & currentPath & logFile & ” 2>&1″
‘run kcptun
WshShell.Run cmdLine, 0, False
‘wait for 1 second
‘WScript.Sleep 1000
‘Wscript.echo cmdLine
Set WshShell = Nothing
Set fso = Nothing
‘quit
WScript.quit
这里注意
1、kcptunConfig中12300这个端口是自己选的,与之前所有端口都没有关系。
2、127.0.0.1要修改为你ss的IP,2233为之前服务端server-config.json中listen中的端口。
3、key与crypt的值要与服务端server-config.json中保持一致。
创建一个关闭程序:
新建文本文件,内容为:
保存退出,重命名为stop.bat。
接下来我们在设置ss:
服务器IP为127.0.0.1
服务器端口为12300
密码及加密方式与你的ss相同
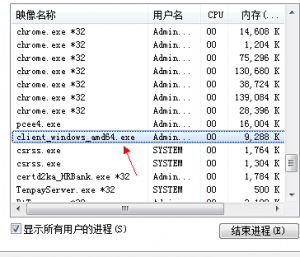
双击run.vbs启动服务,服务启动后,打开任务管理器可在进程中看到此服务,即表示服务启动完成:
现在没什么意外的话,你就可以使用ss来连接这个代理上网了。这个代理的流量就是经过Kcptun加速过的。